These are the useful things I usually do (or part of) after a full Slackware install in order to give Slackware a individual flavor ;-)
Remove unused packages
If you have done a full install, you may want to remove some packages, depending on what you plan to do with your box. You can do this with the "pkgtool" command. You can also have a look at /var/log/packages and remove unwanted packages with "removepkg".
Packages I always remove after a full install is the KDE language blast from the KDEI series.
Scripts
If you ever want to rerun setup to change settings you made during initial setup, just call "pkgtool"
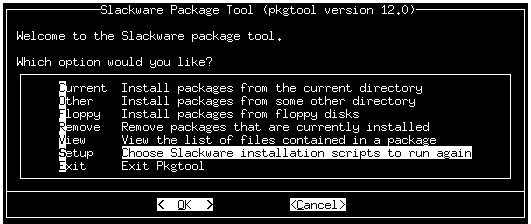
If you want enable or disable scripts, do this in /etc/rc.d. To have a service executed a start time set mode 755. To disable it just remove the x-flag (mode 644)
Speed up booting
Two things extremely slow down boot sequence in Slackware:
- ldconfig
- fc-cache
ldconfig only needs to be run after installing a new library, fc-cache after installing new fonts. Disable them (comment out) in /etc/rc.d/rc.M:
#if [ -x /sbin/ldconfig ]; then
# echo "Updating shared library links: /sbin/ldconfig"
# /sbin/ldconfig
#if [ -x /usr/bin/fc-cache ]; then
# echo "Updating X font indexes: /usr/bin/fc-cache -f"
# /usr/bin/fc-cache -f
Framebuffer with a nifty penguin
I like to have framebuffer support during boot with a nifty penguin.
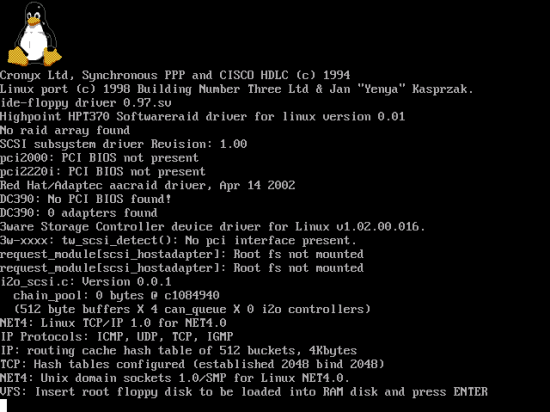
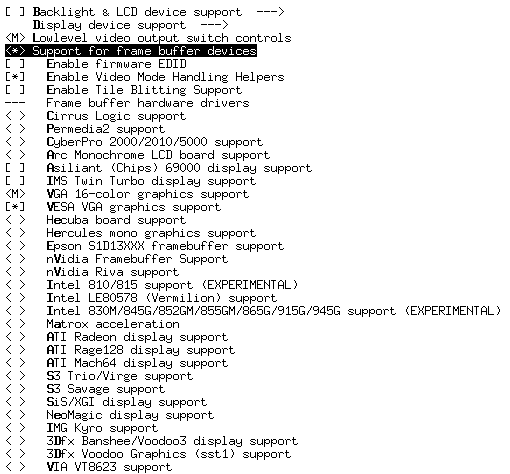
Framebuffer support has to be enabled in the kernel:
make menuconfig
>> Device Drivers >> Graphics support
>> Console display driver support
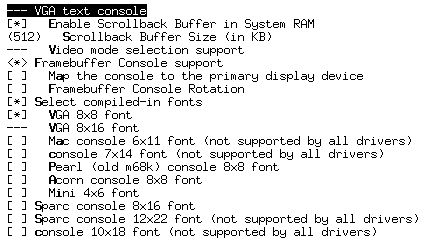
>> Bootup logo

You need to seta proper VESA mode in your boot loader. Which one you need really depends on the type of VESA 2.0 compliant graphic card that you have in your system, and the amount of video memory available. I use the "0x307" mode. Adjust your /boot/grub/menu.ls or /etc/lilo.conf file for this:
title Linux 2.6.23.16 with FB 1280x1024 (0x307)
kernel (hd0,0)/boot/vmlinuz_2.6.23.16 root=/dev/sda1 vga=0x307 dev=/dev/hda=ide-cd acpi=off
The following table shows the mode numbers:

Address your CD / DVD burner with ide-cd
If you still use "SCSI emulation support" in the kernel + the ide-scsi option, there is a much better way!
Ide-scsi is no longer needed for cd writing applications! The 2.6 kernel supports direct writing to ide-cd, which eliminates the need for ide-scsi + the entire scsi stack just for writing a cd. The new method is more efficient in every way. Just apply:
dev=/dev/hdx=ide-cd
in your boot loader config file. Replace the "x" with whatever is appropriate for your drive.
Adjust rights of user accounts
To make things easier, you might want to add your user account(s) to some groups:
- disk
- audio
- video
- cdrom
- scsi
Be cautious! As a rule of thumb, only apply rights to your user account(s) on a "need to have" principle.
Setup BashRC
The two concerning files are:
- ~/.bash_profile: Gets read when you start bash as a login shell
- ~/.bashrc: Gets read when you launch bash as a non-login shell
Due to this, it will not work when you put user-specific startup commands in ~/.bashrc. To have this work, edit ~/.bash_profile and add the following at the top:
if [ -f ~/.bashrc ]; then
source ~/.bashrc
fi
Utilize aliases
Defining an alias is a excellent way to minimize your work at the keyboard, and you can also eliminate the need to remember long, awkward commands by creating synonyms that are more meaningful to you. You can define global aliases in /etc/profile or your specific aliases in ~/.bashrc. Here are some examples:
alias tmess="tail -n 300 /var/log/messages | more"
alias tsys="tail -n 100 /var/log/syslog | more"
alias www="cd /var/www"
alias tmail="tail -n 100 /var/log/maillog | more"
alias linux="cd /usr/src/linux"
alias l="ls -l"
alias la="ls -la"
alias chownr="chown -R root.root"
alias rmmailq="postsuper -d ALL deferred"
alias cl="clear"
alias Mount="sudo /bin/mount"
alias Umount="sudo /bin/umount"
Customize the kernel
see related article in the "Slackware Linux" section.
(Unicode UTF-8 support)
see related article in the "Slackware Linux" section.
Setup X
You can use two commands to setup X:
- xorgsetup (might work fine)
- xorgconfig (you need detailed knowledge about your graphic card)
Some graphic cards require vendor drivers in order to support high resolution or 3D features. If so visit your vendors website.
Install VMware
see related article in the "Slackware Linux" section.
Setup sudo
see related article in the "Slackware Linux" section.
Change the boot loader
see related article in the "Slackware Linux" section.
Install Webmin
Webmin is a web-based interface for system administration for Unix. Get it from www.webmin.com.
Extract it and run the "setup.pl" script. Webmin uses port 10000 by default. If you want to use SSL, let webmin create a certificate for you. Webmin displays the access link at the end of setup, e.g.:
http://localhost:10000
https://localhost:10000
Setup NTP
There is quite a bunch of reasons to have accurate time. Since Slackware 12 this is a easy task:
change /etc/rc.d
chmod 755 rc.ntpd
Adjust your ntp.conf in /etc. You must at least define a time source. There is a ntp.conf exampe in /etc, but I prefer to use a plain one. The server below is the time source of the University of Zurich. Have a look on the Internet for a list of time sources.
ntp.conf:
server 129.132.2.21
driftfile /etc/ntp/drift
logfile /var/log/ntp.log
Before Slackware 12 there was no startup script for ntpd. So I put the ntpd start sequence in /etc/rc.d/rc.local:
# Start NTP daemon
#echo "Starting ntpd ..."
/usr/sbin/ntpd -c /etc/ntp.conf -p /var/run/ntpd.pid
The ntp.conf file was no different.
Setup BackupPC
see related article in the "Slackware Linux" section.
Setup FWBuilder
see related article in the "Slackware Linux" section.
Sound setup
First, make the alsa start script executable, if not already so.
change /etc/rc.d
chmod 755 rc.alsa
Run "alsaconf"
alsaconf
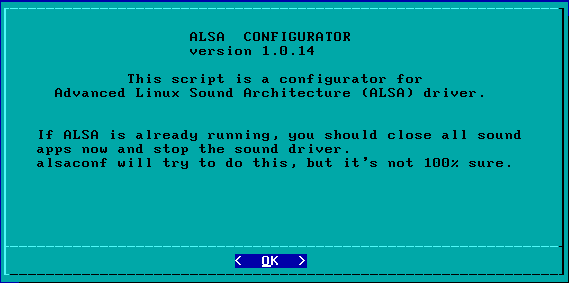
In the next screen (not shown here), alsconfig identifies your sound card.

I prefer to say no here. Just make sure that your kernel has module support for the identified sound card. If so the kernel will load the proper module for your sound card and you don't need modprobe settings.
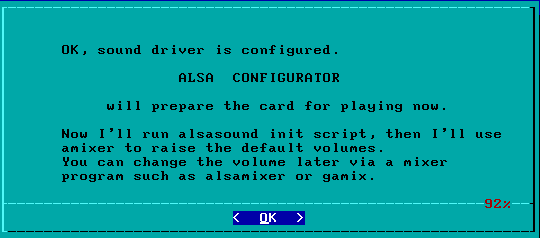
Next, run "alsamixer"
alsamixer
Exit alsamixer and save settings
alsactl store
Install codecs
To have support for the various formats, you should consider to install a codec pack.
- Get a binary codec package from the Internet (e.g. mplayerhq or so)
- Extract the codec package to /usr/lib/codec
- Create a symlink pointing to /usr/lib/win32 (ln -s /usr/lib/codec /usr/lib/win32)
- Make sure your player uses the above path. Most players use /usr/lib/win32 by default
(Enable OpenGL)
You have to edit the file /etc/X11/xorg.conf. For your own safety make a copy of it first. Look for the settings below and uncomment them to activate. If they don't exist, you have to add them manually.
# Loads the GLX module
# Load "glx"
# Loads the DRI module
# Load "dri"
# Section "DRI"
# Mode 0666
# EndSection
If you want MS Vista transparency windows, go to end and add:
Section "Extensions"
Option "Composite" "Enable"
EndSection
The KDE and Xfce versions that come with Slackware 12 are ready for the transpareny feature. Nevertheless, be aware that you should own a powerful graphic card. Be also aware that some graphic chips (e.g. Nvidia) will require further configuration. Refer the vendors website. Finally, as soon as you are in X, check for direct rendering support:
glxinfo | grep direct
It should say: "direct rendering: yes"